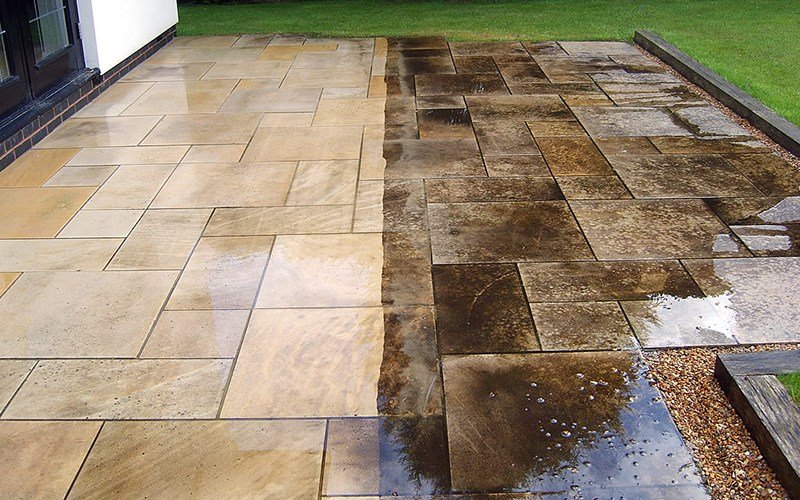
A well-maintained patio adds aesthetic appeal and functionality to your outdoor space, creating a perfect spot for relaxation, entertaining guests, or enjoying meals. However, over time, exposure to the elements can leave your patio looking dirty and worn. Fortunately, with the right techniques and a bit of elbow grease, you can restore your patio’s charm. In this guide, we’ll walk you through the step-by-step process of cleaning your patio effectively.
Materials You’ll Need:
- Broom
- Garden hose or pressure washer
- Bucket
- Dish soap or specialized patio cleaner
- Scrub brush or deck brush
- Stiff bristle broom or power broom attachment (for larger patios)
- Rubber gloves
- Safety goggles (when using a pressure washer)
- Water sealant (if needed)
Step-by-Step Cleaning Process:
1. Clear the Area: Before you start cleaning, remove any furniture, planters, or other objects from the patio. This will give you a clear surface to work on and prevent any damage to your belongings.
2. Sweep Away Debris: Use a broom to sweep away leaves, dirt, and loose debris from the patio surface. This will make the cleaning process easier and prevent scratches caused by debris during scrubbing.
3. Rinse the Surface: If you have a garden hose, give the patio a thorough rinse to remove loose dirt and grime. If your patio is particularly dirty or stained, consider using a pressure washer on a low setting. Be cautious not to use too high a pressure as it could damage the surface.
4. Prepare a Cleaning Solution: Fill a bucket with warm water and add a few drops of dish soap or a specialized patio cleaner. Mix the solution until it’s well combined.
5. Scrubbing: Dip a scrub brush or deck brush into the cleaning solution and start scrubbing the patio surface. Focus on areas with stains, moss, or mold growth. For more stubborn stains, you might need to scrub a bit harder or let the cleaning solution sit for a few minutes before scrubbing.
6. Address Stains: For specific stains like grease or oil, you can create a paste using baking soda and water. Apply the paste to the stained area, let it sit for a while, and then scrub it off.
7. Rinse Thoroughly: Once you’ve scrubbed the entire patio, rinse away the cleaning solution using your garden hose or pressure washer. Make sure there’s no soapy residue left on the surface.
8. Allow to Dry: Let the patio air dry completely before moving any furniture or objects back onto it. This helps prevent slips and falls and ensures that any remaining moisture doesn’t cause damage.
9. Apply Water Sealant (if needed): If your patio is made of concrete, stone, or other porous materials, consider applying a water sealant after it’s fully dry. This will help protect the surface from future stains and weather-related damage.
Conclusion: Regular maintenance and proper cleaning can prolong the life and beauty of your patio. By following these step-by-step instructions and using the right materials, you can ensure that your outdoor space remains inviting and enjoyable for years to come. Remember to clean your patio periodically to prevent dirt and grime buildup and tackle any stains promptly for the best results.
Why hire a professional to take care of your outdoor surfaces?
Pressure washing comes with its specifics and techniques, and professionals spend a lot of time learning the trade. Different surfaces require a different kind of approach. Sometimes, too much pressure directed in the wrong way can completely damage the surface of your decking, fence or garden furniture. DIY pressure washing with chemicals can be dangerous to you and your family and may not bring the results you expect.
That’s where Shining Oven steps in.
Pressure washing professionals will not strip away layers of your exteriors, exposing them to weathering, that’s for sure. On the contrary, they know how to pressure wash different types of patios, be it natural stone or limestone. They know the exact pressure needed and where and how the jet spray should be directed to, and won’t resort to using any kind of chemicals during the cleaning process.
