dishwasher salt

How Often Should You Put Salt in a Dishwasher

For your dishwasher to provide the best possible results it should work in optimal conditions. You will have to decide how often to put salt in it, depending on whether your supplier provides soft or hard water. Even though most dishwashers have an integral water softening unit, you still must supplement it with granular salt. If the water does not contain calcium particles then it is soft, making the detergent you use work more effectively and not leave streaks on your dishes. Hard water usually blocks the washer jets with limescale and causes deposits on the heating elements, which in turn reduce cleaning efficiency, shorten the life of the machine and increases the electricity bill. 

To avoid all this, you must ensure regularly topping up the reservoir of your dishwasher with granular salt to provide a soft water supply.

So if you’re:

  • Wondering how to use dishwasher salt.
  • Looking to find out what dishwasher salt is.
  • Trying to figure out what type of salt you can put in your dishwasher.

This post is for you.

How do you use dishwasher salt?

If you have ever wondered how to use dishwasher salt it is always best to first check the manual provided by the dishwasher manufacturer to be sure where does dishwasher salt go. Before you use your dishwasher, you must make sure to fill in the dishwasher reservoir with a salt solution. If this is not the first time and the reservoir is full of water, you can still pour the salt in it and it will dissolve. If you are not going to use the machine immediately after refilling it, it is best to wipe away any displaced water from the machine with a paper towel.        

 Now that you know where to put dishwasher salt and have successfully filled in the reservoir make sure to return the cap and close it tightly. Most of the water softeners can be adjusted according to the water hardness to achieve optimum results. 

Why should you use dishwasher salt?

Since you are already using dishwashing detergent, then why do you put salt in a dishwasher? Some of the main benefits are:

  • Limescale prevention – Regular replenishing of the salt supply in your dishwasher will keep the water soft and that may be crucial to your appliance if you live in an area with hard water. This will ensure a lower amount of malfunctioning parts due to limescale build-up. A monthly top-up is recommended.
  • No watermarks on your glasses and dishes – the easiest way to check if you need a salt top-up is to inspect your glassware. If you find any watermarks or spots, this means the water used by your dishwasher has gone quite hard. Softening the water would ensure a clean and finished look on all your glass dishes and glasses. 

How much salt to put in a dishwasher?

Some machines may make it quite easy for you to know when you need to refill the salt. There is often a float indicator or another type of warning light which will go off when you need to top it up. But even if you have such an indication it rarely tells you how much salt to put in the dishwasher. Either way – you should always make sure to fill in the reservoir to its maximum capacity. Each wash will use up some salt to soften the water. So, depending on your usage you should make it a habit to top up the dishwasher with salt at least once a month. 

 It is impossible to put too much dishwasher salt and cause cutlery corrosion. If you find any rust on your cutlery then that means they are simply not suitable for a dishwasher and should be washed by hand.

Can I use any type of salt?

Granular salt classified for dishwashing use is the only type of salt you should be using for your machine. Even though it is called salt and is the same chemical that makes table salt, it should not be mistaken and cannot be substituted by sea salt, cooking salt or table salt. The salt used in cooking is usually very fine and may result in clogging when wet, while dishwasher salt is granular and dissolves slower and does not block the softening unit.

Most of the salt sold in the Ireland comes from an underground Cheshire mine. There are some dishwasher salt varieties offering Dead Sea salt, that can be used carefully. Dead Sea salt often contains small organic matter, which is insoluble and if used frequently can cause problems.

Book a professional service

You can rely on expert cleaners that know how to get rid of even the most challenging stains and are always ready to take the weight of cleaning from your shoulders. Contact us now and book a local professional cleaner that will bring your dishwasher back to life. Moreover, If your kitchen appliances need a deep clean, consider combining both services for wonderful results!

how to clean stained toilet bowl

How to clean a very stained toilet bowl

Toilets are the centre of every bathroom, that’s why it’s such an eyesore when you see one with dark brown stains. While there are many commercial products on the market for very stained toilet bowls, you can also use some home ingredients to achieve great results.

So, if you:

  • Recently bought or rented a new home and the toilet is in unsatisfactory condition.
  • Tried different cleaning chemicals, including bleach, but the stains are still there.
  • Don’t want to buy a new toilet, but can’t stand to look at the stains any longer.

Then read along to learn how to clean a very stained toilet bowl.

How do tough toilet stains happen?

Your toilet can get stained even if you clean it regularly and adequately. The reason is not that you’re doing it wrong; but rather that there’s something in the water. 

You see, there are two types of water: soft and hard. The liquid is soft when it falls in the form of rainfalls. However, as it travels through the rocky ground, it picks up minerals such as chalk, calcium, lime, iron and magnesium. They, in turn, make the water hard. Hard water always leads to mineral build-up, because of the minerals it contains. They attach themselves to every surface they come in contact with. The green or brown stains in your toilet indicate that your water is hard and the toilet has lime build-up. That’s why all your cleaning attempts so far have failed.

Important: Bleach does not work against stains in the toilet, because it only bleaches them and doesn’t remove the limescale.

Preparations

Before you get down to cleaning your stained toilet bowl, make sure you’ve prepared the following items:

  • No abrasive brushes – wire brushes will damage the enamel surface of your toilet. Better alternatives are brushes with plastic bristles or pumice stone. Mind you, the toilet should be slightly wet if you use the pumice stone; otherwise, you will scratch the surface.
  • Toilet only gloves – have a separate pair of gloves only for your toilet to avoid cross-contamination.
  • Clean tools – always keep your brushes and sponges clean to avoid spreading bacteria. When you start cleaning, make sure it’s with clean tools.

How to clean a very stained toilet bowl

This method will teach you how to remove limescale from toilet below the waterline. However, it can also be used for the rest of the bowl.

  1. Stop the water supply – locate the supply valve in your home and turn it clockwise until the water stops. This will allow you to work directly on the stains and your cleaning solution will not get diluted.
  2. Remove the water from the toilet bowl using a cup. Remove the last drops of water with a sponge.
  3. Use vinegar and baking soda – 
    1. Pour 1 or 2 cups of white distilled vinegar into the toilet bowl.
    2. Sprinkle some baking soda. You will get a sizzling reaction.
    3. Wait about 15 minutes.
    4. Scrub the stains with your brush or pumice stone.
    5. Turn the water back on and flush.

You might have to repeat the process if you still see stains.

Why is it important to remove water stains from your toilet bowl?

Besides just looking plain nasty and giving wrong impressions to your guests, there is one more reason why you should clean your stained toilet bowl. The deposits from the bowl go down the drain every time you flush. In time the deposits might collect somewhere further down the pipes and might restrict the water flow. A blockage is a worst-case scenario, and it’s not unlikely. If it’s too late and your toilet seems blocked.  

How to prevent long-term limescale build up in your toilet

Clean your toilet every month and clean below the water level every few months. That’s so the limescale deposits wouldn’t pile up on the surface they come in contact with.

As far as the water itself, you can install a water softener system. It’s a whole-house filtration system meant to remove the minerals from the water which make it hard. This will not only be good for your toilet but your taps and appliances which use water. However, the downside is that it’s quite expensive to have such a machine installed. It’s much more affordable just to hire professional help.

Hire professionals

If you lack enough free time or simply don’t want to kneel down and scrub the brown crust off your toilet, it’s time you hired professionals. ShiningOven Services works with professional cleaners who are experienced and fully equipped for any cleaning task. They will have your toilet looking like new in no time.

green clean

How to Green Clean Your Home

Keeping ourselves and the environment healthy is a top priority. And using green cleaning products in your daily life may be a great idea for people wanting to live a more eco-friendly lifestyle. In this article, we will take a look at some ideas of how to make cleaning safe for the environment and give you some tips on what products you can use for that. 

So, if you:

  • Have decided to use green clean products and are looking for “recipes” and ideas;
  • Wonder if natural ingredients are as effective in killing bacteria as commercial ones;
  • Have already tried cleaning some stuff with eco-friendly ingredients and are wondering what else you can or can’t clean this way;

Then, keep reading and we will tell you all about natural cleaning.

What does green cleaning actually mean?

For some people, green cleaning means making their own solutions with natural ingredients they have to clean their home. For others, using manufactured, eco-friendly green cleaners is the way to go. In both cases, people, who are considering switching to green cleaning, are looking for ways to reduce their adverse impact on the environment. These types of products and ingredients are not only Nature-friendly, but they are also generally safer for people, as well. 

It is not easy, though, to evaluate which product is safer and “greener”. While natural ingredients, such as vinegar, baking soda, lemon, etc. are common substances to use for green cleaning, when you opt for commercial products, it is often hard to determine which are safe and which are misleadingly labelled. Many companies put labels such as “eco-friendly” and “natural” without having any certification at all. A good idea, when looking into a new commercial bio-cleaning product, is to check for any third-party certification. Some of the most popular certifications are  Green Seal, Ecologo and Safer Choice. For products that don’t have certification, you can try to look them up on various consumer product information and rating websites or apps, such as the temporarily unavailable Goodguide.  

What are the popular basic natural ingredients you can use for green cleaning?

If you want to go DIY with green cleaning, there are many common household ingredients that you can use to do so. There is actually a pretty high chance you already have most of them in your cupboards. Let’s look at some examples:

  • Vinegar – Vinegar is a simple and cheap solution to clean stains, mineral deposits, remove foul odours, and to use for general disinfection.  
  • Baking soda – This is another well-known household cleaning ingredient. Baking soda is often used as a hard scrub for its abrasive properties and it can also be combined with vinegar to create a foamy cleaning solution.
  • Lemon juice – This is another popular food acid that can deal with and eliminate common harmful bacteria and grease.
  • Olive oil – Olive oil is a very good ingredient to polish wooden surfaces. 
  • Essential oils – Do you want your house to smell nice and fresh after you have cleaned it? Essential oils are the way to go.
  • Hydrogen peroxide – One of the popular green cleaning disinfectants, hydrogen peroxide is a go-to solution when you want to get rid of bacteria in your kitchen for example. Keep in mind that it needs time to work, though. Also, it has bleaching properties, so use it with caution to avoid damaging surfaces or items.
  • Castile soap – This is an unscented soap in a liquid form that is biodegradable. And as we all know, soap cleans very well and can be used for just about anything.

Along with using natural household ingredients, you will also need some tools to do the job properly. Let’s list some common tools that can help you with green cleaning in your home.

  • Glass spray bottles – When you make a cleaning solution, the easiest way to apply it is with a spray bottle. Buying reusable glass bottles that last long helps with being sustainable.    
  • Microfiber cloths – They are great for wiping things, obviously. Microfiber cloths can be washed and reused many times as opposed to paper towels, for example, and are lint-free.
  • Scrubber brushes – The “workhorse” in home cleaning – it’s always good to have one.
  • Pop-up sponges – These sponges are made from cellulose and are biodegradable.

These are some of the most common household ingredients and tools that can help you with cleaning almost anything around your home. Of course, there are more options but these are also the most cost-effective.

How to clean green by combining natural ingredients for different purposes

We’ve listed some of the most common green clean ingredients that you can use to clean your home. Some of them work pretty well on their own but let’s look at four ideas on how to combine them and make them even more effective.

All-purpose cleaner – Let’s start with something essential. A half cup of vinegar and a quarter cup of baking soda into two litres of water makes a perfect all-purpose cleaner to use around the home. 

Bathroom mould remover–  The most commonly used product for removing mould is bleach, but it’s toxic and harmful. Instead, try mixing one part hydrogen peroxide with two parts distilled water in a spray bottle, wait a couple of hours and rinse off. Keep in mind that the best way to battle mould is prevention.

Carpet stain remover – Nobody likes carpet stains. This is where vinegar comes in handy again. Mix equal parts of white vinegar and water in a spray bottle and spray the stains. Wait for a couple of minutes and use a brush to scrub it clean.

Stovetop cleaner – If your stovetop is glass or ceramic, you can use castile soap and water or vinegar spray solution for day-to-day cleaning. 

More good practices for natural cleaning

We have already mentioned a lot of ideas on how to green clean your home. But along with using safer detergents or natural household ingredients, there are other things to keep in mind, as well. 

Improve indoor air quality – Modern homes and offices are insulated very well. While this is good for energy efficiency, it’s bad for the inside air. It can get very stale very quickly, especially in properties where people use chemicals to clean. The solution is an easy one. Open up your windows as often as possible to keep the air fresh and the toxins out. When the weather is cold, open the windows and doors wide for about five minutes.

Dispose of toxic materials – If you,ve been used to cleaning with toxic cleaning agents, make sure to dispose of them properly now that you’ve become a green convert. Remember – if they are toxic inside, they are also toxic to the environment. Look around for organised initiatives for disposal of dangerous chemicals and detergents. Commercial dry cleaners are probably the most dangerous cleaners you can get, so try to avoid using them.

Keep clutter out – Dispose of any items you haven’t used in over two years. Manuals for electronics can be downloaded from the internet in a PDF form, for instance, instead of cluttering drawers and cupboards with piles of paper. Old clothes, which only take up room in your wardrobe, can be given to charity. Documents, you no longer need, can be easily recycled. The less items you have collecting dust, the better your home is going to feel and look. Not to mention that it will take less time to clean.

Leave shoes at the door – You step onto all kinds of stuff everyday, such as dust, dirt, pebbles, animal waste and even chewing gum. The last thing you want is to bring all that filth into your home, which you’ve so eagerly cleaned. The solution is simple. Buy a shoe mat for your everyday shoes and leave it besides the door. That way you’d have easy and fast access to them instead of having to check the shoe cabinet every time you want to go out.

A few words on commercial green cleaning products

If you find mixing detergents and solutions too time-consuming and are keeping away from green cleaning just for convenience – don’t. Nowadays, as people have become more aware of sustainability and eco-friendliness, there are many commercial safe detergents out on the market. Actually, many people prefer using them instead of making their own DIY solutions. As we’ve mentioned above, look for third-party certifications and do your research beforehand. And you can easily make the switch to green cleaning with the help of ready-made products. 

Contact a professional eco-friendly cleaning company

If you find it hard to deal with cleaning your property on your own and you think switching to green cleaning will make the job more time-consuming, consider getting help from professionals, who care about the environment. ShiningOven Services aims to deliver safe and eco-friendly cleaning services to customers, who want to make the change but need help in doing so. Our services are getting more and more sustainable, so you don’t have to worry about making a negative impact on the environment. We work with certified detergents that are safe for your home, loved ones and the planet. Feel free to learn more about it on our website.

how to clean a toaster

How to clean a toaster

It’s one of the most used and least appreciated appliances in your kitchen. When you’re in a rush or don’t have the energy for complex recipes, popping some bread in the toaster is an easy way to make a quick snack.

The humble slice of toast has to be one of the most versatile foodstuffs in the world. You probably have half a dozen potential toast toppings in your fridge or larder. In the time it takes to swipe a knife you can turn your toast into something sweet or savoury, healthy or sinfully delicious.

But how often do you clean your toaster? Cleaning out a toaster doesn’t have to take more than a few minutes. Read on to find out how to clean a toaster inside and out.

This article is for you if:

  • You’re tired of finding dried breadcrumbs all over the worktop.
  • Using the toaster produces a smell of stale things burning rather than fresh bread browning.
  • If you don’t know how to clean out a toaster when something gets stuck inside it.

Tools and materials

Just getting rid of crumbs doesn’t require anything more complex than your hands, and the only materials required are a rubbish bag. Then you’re planning to go a little further than that you’ll find it useful to have the following items:

  • A rubbish bin or bag;
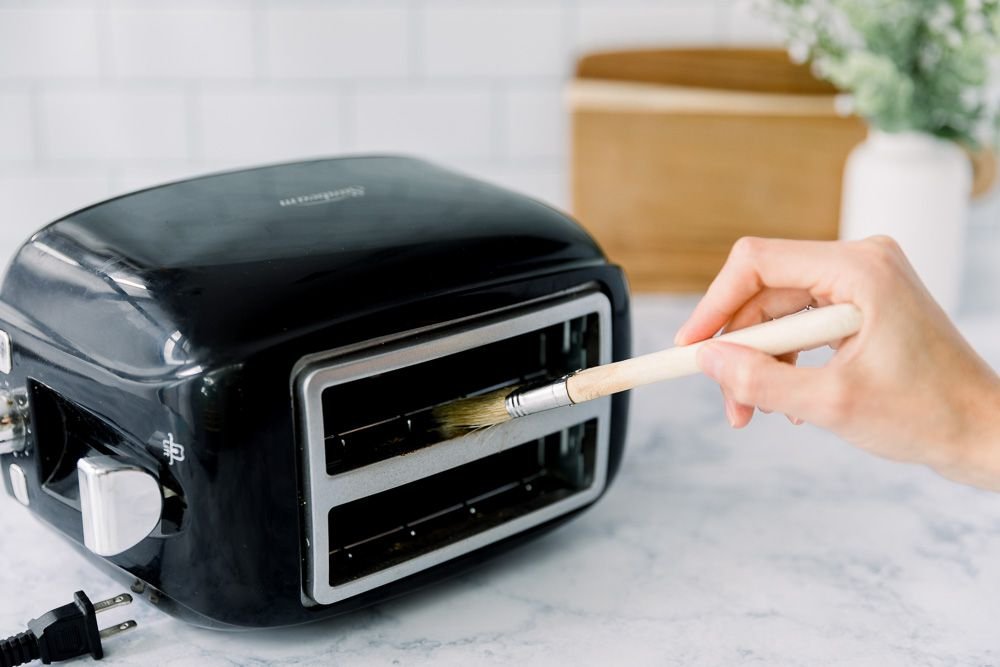
  • A small brush – a pastry brush for loose crumbs, a bottlebrush or a used toothbrush if something’s stuck;
  • Warm water, washing-up liquid;
  • A soft cloth;
  • White wine vinegar and/or kitchen cleaner;
  • Baking soda.

Clean the inside of your toaster

It’s pretty obvious, but in the interests of safety, we’ll just mention it. Before starting to clean a toaster you need to unplug it and leave it to cool!

Get rid of loose crumbs

  1. If you have a crumb tray, keep the toaster in the upright position and gently shake it.
  2. Holding the appliance over the bin or rubbish bag slide the crumb tray out. Wash the toaster tray in warm water with a little washing-up liquid and set it aside to dry.
  3. Use a sponge or cloth rather than an aluminium scrubber as you don’t want the scratch the tray. If you do the scratches will trap crumbs in the future.
  4. Most of the crumbs will have fallen neatly in the bin but toasters have all sorts of nooks and crannies where debris gets caught so give it another gentle shake to free them. Turn the toaster upside down and shake again.

Clean the outside of your toaster

Toasters with a plastic exterior can be cleaned using a cloth dampened with diluted general-purpose kitchen cleaner. If your toaster has a chrome or steel finish, white wine vinegar works better as it brings back the shine and won’t leave smears.

If any marks don’t lift with diluted cleaner apply a little unconcentrated cleaner, leave for a few minutes then remove with a clean damp cloth. The watchword here is damp. When cleaning any electrical appliance always use the minimum amount of liquid that will do the job.

How to remove toasted cheese from a toaster

Standard pop-up toasters aren’t really designed for toated sandwiches and you should definitely never use them for cheese on toast! If however, you’ve managed to get melted cheese or any other melted food stuck to the inside of the toaster:

  1. Unplug it and let it cool.
  2. Once the stuck food has solidified, use a soft kitchen spatula to remove the majority of the debris, then a soft toothbrush to get rid of the rest.
  3. Again, you can use white wine vinegar on the brush if you need some extra cleaning power.
  4. Make sure the toaster is fully dry before using it again.

How to remove stains from a toaster

The steps described above will generally be enough to remove most marks from the outside of toasters but if you have stubborn stains try the following:

  • White wine vinegar and water – A 1 to 1 mix of these two ingredients left for a few minutes on the stain may be sufficient to lift it.
  • Baking soda paste – Add just enough water to the soda to make it stick together. Apply to the stain and leave it for a few minutes. Wipe off with vinegar. If the stain is really stubborn, use a soft brush to gently scrub. The soda is abrasive enough to lift stains but won’t cause scratches.

How often should you clean your toaster?

Apart from the fact that a dirty toaster is unhygienic and won’t produce great tasting toast, it’s important to remove crumbs regularly as they’re a fire risk. How often you need to clean the toaster depends on how often much you use it and what for.

If all you do is toast bread, a weekly removal of crumbs and a few minutes of deeper cleaning once a month should be sufficient. If you put sweet or crumbly bakery products in the toaster you’ll need to clean it more often.

If you smell burning when you use the toaster it’s overdue for a cleanout!

Hire a professional

OK, you’re not going to employ someone just to clean a toaster but keeping small appliances clean is something that any competent domestic cleaner will do as part of their regular routine. Or you could add toaster and other small appliance cleanings to a specialist option such as the oven cleaning service bookable through ShiningOven.

how to clean light fixtures

How To Clean Light Fixtures

Light fixtures can set the tone for every room in the house, which is why it’s important to keep them clean. After all, dusty and grimy is probably not the mood you had in mind when you were selecting your chandeliers or picking out those Einstein bulbs.

Learn how to clean light bulbs and light fixtures so that your home is filled with a warm and welcoming glow.

Note: The first step in knowing how to clean light fixtures and light bulbs is safety. First, the bulbs themselves should be cool; hot bulbs may explode when touched or exposed to cleaning products. You should always make sure the power source is switched off or unplugged before you start cleaning. And when you’re working on fixtures with cleaning solutions, you should also cut turn off the power to the room. Make sure you or someone in your home knows how to operate your circuit breaker or fuse box before attempting this.

Light Bulbs

If you’re taking the time to clean fixtures, you may as well clean the bulbs. They only add a few minutes to the task, and all you need is a dry microfiber cloth.

  1. Unscrew the light bulb.
  2. Wipe dust away from the bulb using a damp microfiber cloth. A dry cloth won’t do the trick here because the heat from bulbs can bake dust onto the surface.
  3. Replace the light bulb.

Chandeliers and Pendant Light Fixtures

As you can probably imagine, cleaning a chandelier can be a time-consuming task, so it’s a good thing you really only need to do it once or twice a year. And if you don’t have the time to spare, you can always call your local Merry Maids for help with chandelier cleaning. Merry Maids uses a special crystal-cleaning formula that is sprayed on and left to drip dry. These products are also available online if you want to try them out yourself.

For dedicated DIYers, there are two methods of cleaning these light fixtures: with the crystals on or with the crystals off. Which is the best way to clean chandeliers? Well, that depends on whether you’d rather spend a long amount of time standing on a ladder or whether you’d rather reassemble your light fixture.

Below you’ll find instructions for the crystals-off method, which allows you to spend more time sitting down, rather than balancing. It’s also more or less the same method you’d use on ceiling fan globes or pendant light fixtures with globes or bell-shaped glass.

Note: Regardless of what type of light fixture you’re cleaning, this is a two-person job.

You’ll need:

  • Gloves
  • A spray bottle
  • Several microfiber cloths
  • Distilled white vinegar
  • Water
  • A ladder or stepstool
  • A blanket
  • A towel
  • A cleaning buddy

If you have a chandelier, take several pictures from multiple angles before you start cleaning. You’ll need these as a guide when it’s time to replace the crystals. If your pendant lighting has globes of different sizes, you may want to take pictures as well.

  • Turn off the light fixture and wait for all the bulbs to completely cool.
  • Set a folded blanket down on the floor under your chandelier or pendant light. This will provide a cushion in case any pieces fall. You’ll also need to set a towel on a nearby surface so that you have a place to lay chandelier crystals, globes and any other hardware you’ve removed.
  • Have your cleaning buddy steady the ladder so that you can easily reach your light fixture. Tip: Make sure your ladder is not set on the blanket, as this could make it wobble.
  • Carefully remove the crystals from your chandelier. Work from the top to the bottom so that you can keep them in order, and pass them down to your cleaning partner. You’ll use a similar process for pendant lighting, but you’ll need to take extra care to ensure you don’t misplace any screws or other hardware.
  • Remove any excess dust by wiping your crystals or globe using a dry microfiber cloth. With chandelier crystals, you’ll want to make sure you’re working in the order you set your pieces down on the blanket. Do everything you can to make reassembly easier. You’ll thank yourself later.
  • Combine one part vinegar to three parts water in a spray bottle.
  • Put on your gloves and spritz a clean microfiber cloth with your solution. Use this to wipe your crystals or globe. The gloves help prevent any smudges.
  • Use a dry microfiber cloth to remove any of the remaining solution and to buff out streaks. Your globe, crystals and hardware should be absolutely dry before you replace them.
  • Before returning the globe or crystals to their place, use a dry microfiber cloth or duster to remove any dust from the metal part of the fixture. For stuck-on grime, you can lightly moisten your microfiber cloth with a mixture of water and a few drops of dishwashing liquid.
  • Put your crystals or globes back into place, and restore power to the light fixture.
  • High five your cleaning buddy for a job well done.

Now you know how to clean light fixtures like a pro.

Hire a professional to do it for you

Spending your free time trying to scrub away a nasty grease stain is never fun. So why do it when you can hire someone to take care of the chore instead? 

This is where we come in.

Shining Oven offers professional domestic cleaning services for anyone looking for a way to save precious time from house chores. Give our kitchen cleaning services a try or book our deep one-off option and get to enjoy a professionally cleaned kitchen. The specialists we work with have a lot of experience in property cleaning and are also additionally trained by us, so you can expect great service results every time. Our work schedule is extremely flexible, our regular cleaning services don’t require a minimum contract, and you can organise the whole thing online!  Make your life a little easier and book a service today! 

cleaning coffee machine

How to Clean and Descale Your Coffee Machine

If you’re one of the many people who cannot bring themselves to function without a cup of coffee every morning, then your coffee machine has probably seen better days. The more you use it, the dirtier it gets and at some point, you should give it a thorough clean. If you don’t, you might notice the impurities in the taste of your morning drink – a tiny moment that could ruin your whole day.

In this post, you’ll learn how to clean and descale your coffee machine, how often to do it, and how to keep your appliance clean and neat.

How often should you clean your coffee machine?

It depends on the type of coffee machine you own. As a general rule of thumb, you should clean the brew basket, lid and carafe after every use. If you live in an area with hard water, then your coffee machine’s inner mechanisms will be plagued by limescale buildup. For that, you’ll need to run a cycle with a descaling agent ideally once a month.

Some coffee machines will notify you when they need to be cleaned, either with a visible, or an audible signal, or both. Some of them might even stop running until you activate their cleaning cycle. If you own one of those, make sure to study their instructions manual, so you make sure your coffee machine is working when you most need your daily fix.

Tools you need

  • Dishwashing detergent;
  • A soft cloth;
  • A sponge;
  • Vinegar;
  • Water;
  • Paper towels.

How to clean a coffee machine after every use

Here we’re going to explain the proper maintenance of a coffee machine after each use! Here’s your daily cleaning checklist to follow:

  1. Discard the used coffee. Once your long-awaited cup of coffee is in your hands, don’t sip immediately, but dispose of the used up coffee. Remove the brew basket and empty it along with the disposable paper filter if you’re using one.
  2. Wash the brew basket and permanent filter. Use a soft sponge and dishwashing detergent, and thoroughly wash the brew basket and the permanent filter. After that, wipe them dry with paper towels.
  3. Clean the carafe. Once you’ve poured the coffee into cups for you and all your guests, wash the carafe with a soft sponge and dishwashing detergent. After that, wipe it dry with paper towels.
  4. Wipe the exterior of the coffee machine. Use a damp cloth to wipe down the entire exterior of the coffee machine, thus removing oily spots, fingerprints and leftover coffee.
  5. Reassemble. Once all the parts are dry, you can put everything together and reassemble your coffee machine. Now it’s ready for the next batch of coffee.

How to descale a coffee machine every month

Time needed: 1 hour and 30 minutes.

When you use an appliance too often, especially if this appliance uses water, limescale and mould could build up in its inner workings. This is particularly true if you live in an area with hard water.

Here is how to descale your coffee machine:

  1. Create your cleaning solution.Check your instruction manual for any information about descaling your coffee machine. In most cases, it would be fine to use a solution of equal parts vinegar and water. If your instruction manual says not to use vinegar, purchase the kind of commercial cleaner the manufacturer recommends.
  2. Fill the reservoir with the cleaning solution.Fill your water reservoir with your vinegar and water solution (or with commercial descaler).
  3. Run a brew cycle.Run your coffee maker through a brew cycle with the water and vinegar solution. Let it drip into the carafe. Stop the cycle in the middle. This ensures that the solution has filled the entire inner system.
  4. Let it sit for an hour.Now that you stopped the brew cycle, let the solution do its magic upon the mould and limescale buildup. Let it sit there for 30 minutes to about an hour.
  5. Finish the brew cycle.After an hour has passed, pour the liquid from the carafe away and resume the brew cycle. You may notice brown or white particles floating in the solution – this is dirt the mixture managed to remove from the inside.
  6. Run a brew cycle with clean water.Once the cycle has finished, run another one, this time with fresh water. Repeat as many times you need, until the smell of vinegar is gone. This might take about four or five times.
  7. Wash, wipe and reassemble.When you stop seeing dirty particles in the carafe, and your coffee machine doesn’t smell of vinegar anymore, you’ve done a good job. It’s time to give one thorough wash of the carafe, brew basket and permanent filter. Don’t forget to wipe the exterior as well. Once everything is dry, reassemble your coffee machine.

How to keep your coffee machine clean

Prevention is the best medicine. And while using preventative measures will not replace the need to clean your coffee machine, they will keep it clean for longer. In order to keep your coffee machine in generally good health, here’re what you can do:

  • Use demineralized water. The less hard water you use for preparing your coffee, the less limescale will build up. 
  • Always clean the machine after each use. Make sure to never leave used, wet coffee inside your coffee machine, as that can contribute to the growth of mould and yeast.
  • Run a brew cycle with a cleaning solution on a regular basis. Once a month is ideal to keep your coffee machine clean. If you don’t manage every month, try at least every three months.

Book a professional service

If you are still not convinced that you have the time, desire, or skills to clean your microwave by yourself, then booking a professional appliance cleaning service is our next suggestion. ShiningOven technicians are available six days a week to lend a helping hand and get this chore off your list. Using efficient and safe antibacterial cleaning solutions, ShiningOven professionals would make your appliance sparkling clean and will improve its overall lifespan.