how to clean your kitchen cabinets

How to Clean Kitchen Cabinets

We all know the drill when it comes to kitchen cleaning – you wipe the counters, vacuum and mop the floor, clean the oven, pray before you open the fridge, and so on. But what is the thing that we tend to forget about most frequently?

The cabinets.

If you’ve spotted a ketchup splatter or a coffee speck on your lovely wooden cabinets after reading the last sentence, scroll down to find out how to clean your kitchen cabinets the right way.

How often should you clean your kitchen cabinets?

Cleaning kitchen cabinets isn’t a daily task that you should put on top of your chore list. Generally, it’s best to split the cleaning process into two parts – a general weekly wipe and a deep monthly cleaning.

The most common cabinet stains and how to remove them

The list of things that can stain your cabinets it endless, however, some types of spots appear more often than others. Here you can find information about the most common ones and the proper way to clean them:

Fingerprint marks

Fingerprints are probably the most common stains that could “grace” your kitchen cabinet. No surprise there – imagine how you, your spouse and three kids open the cabinet to get your cereal every single morning. Those are a lot of fingerprint marks. That said, removing the spots is super easy. Just get a piece of cloth, dunk it in some white vinegar and wipe the cabinets clean. 

Food splatters

Food has weird ways of ending up on the most bizarre places. Maybe you spilt your cuppa morning joe and didn’t see the brown streak it left on the side of the furniture piece or the ranch dressing bottle decided to go rogue, while you were seasoning your salad. So, when it comes to removing food stains from kitchen cabinets, it’s best to do it fast, especially if the piece is made from expensive wood. Soak up as much of the spillage as possible and after that apply a thick layer of baking soda mixed with water on top of it. Let is sit there for 4-5 minutes and wipe clean. 

Grease stains

Grease stains are nasty. Period. And on top of being nasty, sticky and smelly, they are a pain to remove, especially the old ones. So, if you are wondering how to clean sticky grease off kitchen cabinets, follow the earlier mentioned fingerprint cleaning method and mind that you’ll need to repeat the whole process quite a few time before you fully remove the grease spots. 

Waters spots

Yup, even water can leave stains on your kitchen cabinets. Funny enough, water marks appear due to cleaning with, well, water. To stop such stains from appearing in the first place, us only distilled water when cleaning your cabinets. 

Scuff marks

Scuff streaks may look like the hardest type of marks to remove, but in reality, they are probably the easiest on the list. Get an ordinary pencil eraser and gently rub it along the dark scuff streak. Remove the residue with a clean piece of cloth and you are done.

How to clean kitchen cabinets

You see, there isn’t a general cleaning method that you can use for all types of kitchen cabinets. This sort of furniture piece can be made from different sorts of material, the most popular being wood, laminate, metal, and additionally, there also painted options. Below you can find information on how to properly clean all of them:

How to clean wood kitchen cabinets

When cleaning wooden furniture, you have to be extra careful,  in order to avoid damaging the piece. In terms of methods, you have two options: to use a store-bought detergent or to go full-on DIY. 

How to clean your kitchen cabinets with a store-bought detergent

Visit your local supermarket and get a grease-cutting dish soap, if you don’t have one already, and mix it with a bit of water. Apply the solution over the stained part of the kitchen cabinet, careful not to oversoak it. Get a piece of clean cloth and start working the detergent into the stain. Once the spot is removed, dry the treated area. 

Easy DIY cleaning method

If you are passionate about DIY cleaning solutions, you know what comes next: white vinegar and baking soda. Use a combination of vinegar and water to remove general stains like fingerprints and a baking soda paste for more stubborn and sticky spots like grease marks. Like with the detergent option, it’s important to fully dry the wooden surface once you are done cleaning it. 

How to clean metal cabinets

If you happen to be the proud owner of metal kitchen cabinets, congratulations – this type of material is the easiest to clean. You can use most of the wood cleaning methods we described above, with the exception of the baking soda paste – the tiny soda particles can leave scratch marks on the shiny metal surface. And again, makes sure to thoroughly dry the cabinets after cleaning them, so they don’t rust. 

How to clean laminated cabinets

Like metal cabinets, laminated ones are super fast and easy to clean. The process goes as such:

  1. First, remove any dust from the cupboards. This will make the cleaning process that comes afterwards far less messy. 
  2. Combine 1 tablespoon of a general dishwashing detergent with 1L of warm water. Stir well.  
  3. Soak a washcloth in the mixture and start wiping the cabinets. Don’t forget to clean the handles and hinges.
  4. Get a clean piece of cloth and thoroughly dry the cabinet. 

That’s it – you are done!

How to clean painted cabinets

Oil-based painted cabinets are fairly easy to clean and can take a more rough scrubbing as well. You can use any of the above-described cleaning methods, but your best option will be the baking soda paste one.

Note that cabinets which have a water-based latex style of paint require a gentler hand. In this case, it’s best to avoid the baking soda method and tools like hard-bristled brushes.

Hire a professional to do it for you

Spending your free time trying to scrub away a nasty grease stain is never fun. So why do it when you can hire someone to take care of the chore instead? 

This is where we come in.

ShiningOven offers professional domestic cleaning services for anyone looking for a way to save precious time from house chores. Give our kitchen cleaning services a try or book our deep one-off option and get to enjoy a professionally cleaned kitchen. The specialists we work with have a lot of experience in property cleaning and are also additionally trained by us, so you can expect great service results every time. Our work schedule is extremely flexible, our regular cleaning services don’t require a minimum contract, and you can organise the whole thing online!  Make your life a little easier and book a service today! 

How to clean a microwave

How to clean a microwave

Microwaves are truly efficient appliances to have in your kitchen. They are extremely convenient and have proven their usefulness in any household time and time again. We have a completely different situation when it comes to the moment you have to clean a microwave. It takes time and effort and in many cases we do not really have the first idea of how to do it. Fret not! We have prepared this post, giving you helpful insight on how to clean a microwave oven the right way.

So, If:

  • Your microwave smells off;
  • Your microwave hasn’t been cleaned in a long time;
  • You don’t know how to effectively clean your microwave.

Then read on.

The dangers of a dirty microwave

While domestic microwaves are generally safe appliances, it is essential to know what are the potential dangers. A really dirty microwave, for example, could become a hazard in two aspects. First of all, leaving splattered or dripped food debris in your microwave, could be excellent grounds for the development of germs and bacteria. As we all know, germs and bacteria thrive in warm and wet areas and a dirty microwave offers both.

In addition, leftover food debris and grime would normally continue to cook and may potentially cause sparking. In order to avoid that, we recommend that you deep clean your microwave at least once a month, and give it a good wipe every week. This way, you would avoid any damages and prolong the lifespan of your appliance.

How to keep a microwave clean

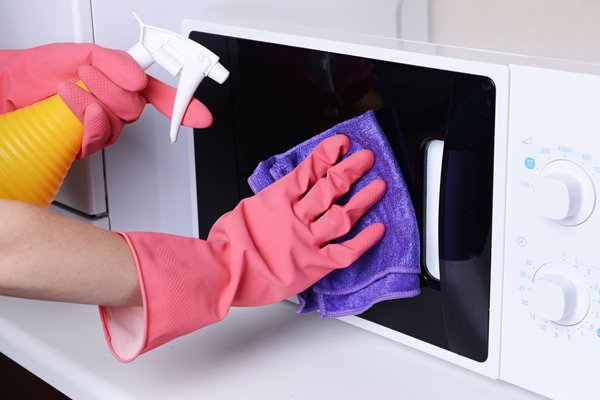
There are a couple of things to consider in order to prevent microwaves from getting dirty and smelly. Below, we have described a few useful and easy methods of cleaning a microwave. As usual – safety first! Before attempting to clean your appliance, make sure to unplug it. You can also use cleaning gloves to avoid any skin damages, especially if you have allergies. Now that you are safe, we can proceed to let you know how to clean your dirty microwave.

Cleaning with lemon

Did you know that you can clean a microwave with a lemon? This is actually a great method recommended by many different sources. It is both organic and safe, eliminating the need to use any chemicals whatsoever. So how does it work?

  1. Take one lemon and cut it in half. Get a microwavable bowl or glass and squeeze as much of the two lemon halves as possible in it.
  2. Add one cup of water and microwave for 5-10 minutes. The end goal is for the inside of the microwave to be steamy. Leave it inside for another 5 minutes.
  3. Then, remove the bowl or glass, as well as the microwave turntable, and carefully wipe the inside of the appliance with a cleaning cloth.
  4. Clean the turntable and place it back into the microwave. Et voila!

Cleaning with vinegar

Next, we are going to review how to clean a microwave with vinegar. Like the lemon cleaning method, this is eco-friendly, affordable, and relatively easy to do.

  1. Fill a microwaveable glass or bowl with half water and half vinegar, heat it up for 5 minutes or until it starts boiling. The steam will dissolve most of the food debris in your appliance and the acetic acid will take care of any unpleasant smell.
  2. Remove the glass/bowl out of the microwave carefully as it will be hot. You can also take out any removable parts such as the turntable.
  3. Wipe with a sponge to clean all dirt and grease and then dry the appliance by using a clean cloth.

You now have a clean microwave, ready to safely serve you and your family again.

Cleaning with baking soda

Let’s now discuss how to clean a microwave with baking soda. Baking soda turns out to be quite useful. There are two ways of cleaning your microwave with baking soda as follows:

  1. Use baking soda directly – Get your baking soda and sprinkle it directly into the microwave. Make sure to remove the turntable and any other dismantlable parts of the appliance. Get a wet cloth or sponge and thoroughly scrub the inside of your appliance including the door and walls. Once you do that, rinse your cloth or sponge and wipe down the microwave. Finally, take a clean cloth and dry off the appliance, both inside and outside. Repeat the process for the removable parts.
  2. Make your own baking soda solution by mixing two tablespoons of baking soda and one cup of water. Place the solution into a microwaveable glass or bowl and heat it up in the microwave. Pour out the ready baking soda paste inside your appliance. Scrub thoroughly with a soft cloth. Rinse and dry off. Do the same for the removable parts.

Cleaning with dish soap

Last but not least, we are going to cover how to clean a microwave with dish soap. In most dish soaps there are no harsh chemicals so this is yet another generally non-harmful cleaning method for you to try out.

  1. Fill in one microwavable cup with water and squeeze in a few generous drops of your favourite dishwashing product.
  2. Heat it up in the microwave until it gets steamy.
  3. Remove the glass from the microwave, as well as any of the appliance’s dismantlable parts.
  4. Thoroughly clean the interior with a wet cloth or sponge. Then, clean the removable parts and dry everything with a dry clean cloth.

All of the cleaning methods we have discussed are going to be very helpful in case of a smelly microwave.

Book a professional service

If you are still not convinced that you have the time, desire, or skills to clean your microwave by yourself, then booking a professional appliance cleaning service is our next suggestion. ShiningOven technicians are available six days a week to lend a helping hand and get this chore off your list. Using efficient and safe antibacterial cleaning solutions, ShiningOven professionals would make your appliance sparkling clean and will improve its overall lifespan.

How to clean your cooker hood

How to Clean Your Cooker Hood

The cooker hood is your kitchen’s magnet for grease and grime. But that should come as no surprise, as that is its job. Located right above your hob, the cooker hood’s primary purpose is to attract all the smoke and steam that comes out of cooking food. So, there’s no avoiding some grease build-up in the extractor fan. What you can avoid, however, are large quantities of it, which can clog the hood filters and make them less effective and more susceptible to fire. Therefore, it’s mandatory to clean your extractor hood, immaculately. Follow this guide and learn how to clean your cooker hood professionally.

So if you: 

  • Have a greasy cooker hood that doesn’t work the way it should.
  • Haven’t replaced/cleaned your cooker hood’s filters recently.
  • Noticed your kitchen is engulfed in a fog of fumes when cooking.

Then keep on reading!

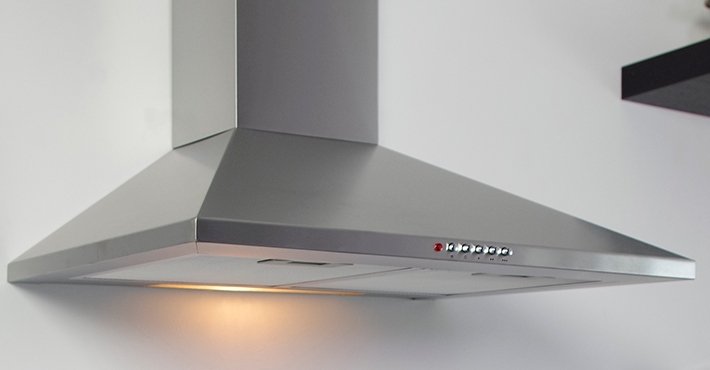
How to clean a stainless steel cooker hood

Stainless steel hoods are the most popular variety in the UK. When they’re sparkly cleaned, they look amazing, when neglected, their run-down appearance can easily ruin your whole kitchen’s image. You can, however easily prevent your stainless steel extractor hood from reaching such a pitiful state. To clean your stainless steel cooker perfectly and without streaks, you will need the following product:

  • Bowl
  • Kettle
  • Sponge
  • An old toothbrush
  • J cloth
  • Bicarbonate of soda
  • Stainless steel cleaner
  • WD-40

Before cleaning your stainless steel cooker hood, make sure to turn it off and wait for it to cool down. Take off the extractor cover and put it to the side. Mix a teaspoon of bicarbonate of soda with boiling water. Use your sponge to spread the soda solution on top of the hood. This will help loosen any grease on the hood and make it easier to get rid of. Wait around 20 minutes and wipe the solution off.

For tougher to clean areas, you’ll need some specific detergents designed for steel surfaces. Like, for example, a stainless steel oven cleaner. Spay the cleaner across the hood surface and wipe it off gently with a j cloth (avoid the use of any hard brushes). If there are any hard-to-reach spots on the bottom side of the hood, use an old toothbrush to clean them.

Once you’re finished with cleaning the cooker hood, you can apply the cream of the crop – some WD-40. Apply it on your stainless steel hood to give it that gleaming finish and the most important – without any streaks.

How to clean a glass cooker hood

Glass hoods are cleaned similarly to stainless steel ones, aside from a few subtle differences. For example, glass is considerably more delicate than steel, therefore it’s easier to chip. And once blemished, oh boy is it visible! 

Prepare a mix of boiling water and baking soda(two full teaspoons). Use a soft cloth to spread the solution all over your glass hood surface. Start with the top part and slowly move onto the underside. Once the whole hood is covered in the mixture, your a paper towel to wipe it all off.

Next, spray some glass cleaner on the hood and wipe it carefully with a jay-cloth. For the finishing touch, add a layer of baby oil to give the glass its immaculate shine.

How to replace a cooker’s hood filter

You should change your one-off cooker hood filters regularly. Failure to do so may lead to ventilation complications.

How to replace grease filters 

Grease filters are most often seen inside vented cooker hoods. What’s great about these is that they have a clever way of reminding you when it’s time to change them. Check their colour! If the grease filter is saturated and discoloured, you probably need to buy a new one.

How to clean an extractor fan filter

Cleaning your extractor fan filters is a simple but essential process that you should not forget for many reasons. A dirty extractor fan can be a fire hazard due to filter clogging grease build-ups and lead to unpleasant smells every time you turn it on. On the other hand, by cleaning your extractor fan filter regularly, you’ll prevent some unwanted guests, such as cockroaches.

How to clean a metal mesh cooker hood filter

Extractor hood filters keep grease from entering the extraction vents. This prevents the vents from becoming clogged and impossible to clean. Most extractor hood filters are fine mesh grates which you can remove and clean or replace, easily. 

Cleaning metal mesh cooker hood filters is simple:

  • Turn off the extractor; 
  • Remove the filters from the hood;
  • Place them in a tub filled with boiling water mixed with baking soda (¼ cup) and dish soap. Let them sit for 20 minutes;
  • When it’s time to take them out, scrub them gently with a soft brush (as to avoid; damaging them); rinse the filters until all the built-up grease falls off;
  • Pat them dry and let them fully air dry for a few hours;
  • Reinstate the filters back into the extractor hood;

How to clean an extractor fan

Cleaning an extractor fan is quite straightforward. Unplug the extractor from the socket. The clean is best done when the hood is cold and you haven’t used it recently.

Remove the outer cover of the extractor hood and use a damp cloth to wipe the fan blades. Avoid getting the blades too wet and always dry them before you put the outer cover back on.

How to clean а cooker hood motor

The motor of a cooker hood is a small induction coil motor, which requires next to no maintenance at all. Yet, the motor won’t perform well if you haven’t changed or cleaned your cooker hood filter in some time. Steam and vaporized grease can pass through dirty filters into the motor directly, causing it to cease working.

Therefore, the trick to a long-lasting cooker hood motor is proper filter maintenance.

How to maintain your cooker hood clean

After all that hard work of cleaning your cooker hood and all its parts, it’s time you learned how to keep them all spotless.

  1. Wipe after use – make sure the unit is turned off and cool. Then, wipe the surface with a rag dipped in soapy water. Afterwards, use a dry rag to remove any watermarks or stains
  2. Clean your cooker hood regularly – By cleaning your cooker hood often, you will prevent grease build up. Frankly, if you clean it after each use, you probably won’t ever need to deep clean it, or at least not in a long while.
  3. Clean the filter once a month – all it needs is a quick wash in the sink.
  4. Cut down on frying – oil is the main source or grime build-up, so the less you fry food, the better. It’s also not very healthy so there’s that.

Need help with cleaning your cooker hood?

We at ShiningOven have got you covered.

Hood cleaning can be tough, time-consuming work, so why not let the professionals do it for you? book a local professional cleaner use only the best tools and detergents to get your cooker hood sparkling in almost no time no matter if it’s stainless steel or glass.

So, save yourself some time and leave the hood cleaning to us.

How to clean a washing machine rubber seal

How to Clean a Washing Machine’s Rubber Seal

Does your washing machine smell funny? The issue may be coming from the rubber seal on the door, also known as a gasket. It traps moisture in the machine and is the perfect place for mould and mildew to grow. In this article, we will outline step-by-step instructions on how to clean washing machine seals to ensure everything stays clean and hygienic.

The supplies and tools that you will need

  • Baking soda
  • White vinegar or bleach
  • A clean towel or cloth
  • Washing-up liquid

Cleaning the washing machine door seal

  1. Add 1 cup of baking soda around the seal inside the drum.
  2. Run the washing machine empty for a few wash cycles. To achieve the best results, use the 90°C setting. This is the easiest way to clean the rubber seal. This goes for the washing machine itself as well.
  3. Add 1 cup bleach and 1 cup baking soda into the washing powder drawer. You can use 2 cups of vinegar, ¼ cup of baking soda and ¼ water instead if you do not have bleach on hand.
  4. When the cycles are completed, put a few drops of washing-up liquid in warm water and mix it well. Using a clean cloth, wipe down the rubber seal on all sides with the mixture.
  5. Make sure to wipe around and underneath the seal, as well.

Another way to clean the seal is with a cotton pad or ball, dampened in white vinegar. Here is how:

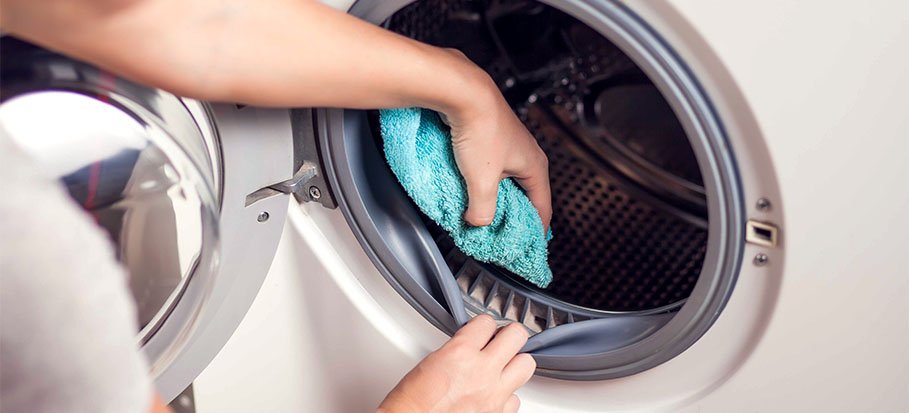
  1. Open the washing machine door wide to expose the seal and use the cotton pad to wipe or scrub the mould away from the large, visible parts of the rubber.
  2. To clean the hard-to-reach parts of the rubber seal, use a Q-tip instead. Don’t forget to dip it in white vinegar before you start cleaning.
  3. Pull the fold of the seal forward with your fingers and use the Q-tip to rub away the mould and any debris that has become stuck in between. You will probably need a few Q-tips
  4. Remember to clean the gasket all the way around, since there might be mould and debris all over it.
  5. Finally, to rinse the washing machine from the white vinegar and whatever smaller dirt particles are left inside it use the self-cleaning function if it has one or run it empty on the warm or hot water cycle.Finally, to rinse the washing machine from the white vinegar and whatever smaller dirt particles are left inside it use the self-cleaning function if it has one or run it empty on the warm or hot water cycle.

How to prevent mould and mildew accumulating on your washing machine seal?

Keep mould and mildew away from your washing machine by following a few easy steps:

  • Leave the washing machine door open when you are not using it, especially after you have finished with the washing;
  • Remove the laundry from the machine as soon as it finishes its cycle;
  • Use a clean cloth or towel to dry the door, seal, and glass once the cycle has finished.

Another reason why mould and gel-like dirt might build up on the rubber seal is if you are constantly washing at low temperatures or use detergents excessively. Using the machine at temperatures of 40°C or less prevents proper rinsing of detergent residue, which facilitates mould, dirt and grease deposits on your gasket.

Book a professional service

You can rely on expert cleaners that know how to get rid of even the most challenging stains and are always ready to take the weight of cleaning from your shoulders. Contact us now and book a local professional cleaner that will bring your splashback back to life. Moreover, If your kitchen appliances need a deep clean, consider combining both services for wonderful results!

How to clean a bathroom extractor fan

How to Clean a Bathroom Extractor Fan

As unpleasant as cleaning a bathroom extractor fan seems, it’s usually a job that can be done in about 20 minutes. And trust us, spending a little time regularly maintaining the fan can save you a lot of headaches in the future.

So, let’s learn how to clean a bathroom extractor fan.

If this sounds familiar:

  • You’re having problems with mould in your bathroom;
  • Your extractor fan is noisy;
  • You haven’t cleaned out your bathroom fan in a while.

Then keep reading, because this blog post will teach you how to tackle this issue!

Why you should clean your extractor fan

The extractor fan plays an important role in keeping your bathroom in good shape, when it does its job, it protects the room from moisture and prevents the appearance of mould and mildew.

However, you need to clean extractor fans every once in a while to allow them to function properly.

If you let dust and grime gather inside the fan, it won’t be able to extract the moisture from the room. What’s more, it might lead to the build-up of mould not only in your bathroom but in the fan itself. This will only circulate the fungi spores around the room.

Mould and mildew can be extremely harmful to your health. Cleaning the bathroom extractor fan will help protect you from them and will keep the room dry and smelling fresh. Not to mention how much quieter the fan will be once you get rid of all the dust that’s gathered inside.

Make sure to clean out the bathroom extractor fan at least once every six months.

What you need

  • Bucket of warm soapy water
  • Duster
  • Old toothbrush
  • Vacuum cleaner
  • Cloth
  • Protective gear (gloves, face mask, etc.)
  • Old sheets or newspapers
  • Step ladder

How to clean a bathroom extractor fan

After you have prepared everything you need, it’s time to put on your cleaning gloves and get down to business.

Here is how to clean an extractor fan in the bathroom:

Time needed: 20 minutes.

  1. Turn off the power.Before you begin, make sure to turn off the main power to your bathroom. This is very important, as it will keep you safe while working and prevent electrocution.
  2. Lay down protective sheets.Place some old sheets or newspapers below the fan to catch all the built-up dirt and dust that will fall out.
  3. Remove the extractor fan cover.Your fan is probably installed high up on the wall or ceiling, so use a step ladder. You may need to unscrew the cover to remove it. In some cases, there might be spring clips that you’ll have to undo.
  4. Clean the cover.Use the duster or a cloth to wipe the dust off the fan cover. If there is a build-up of dirt or grime, soak it in a separate bucket of warm soapy water.
  5. Take out the extractor fan unit.Carefully unplug and remove the extractor fan assembly from its housing.
  6. Dust the fan blades.Using the duster, clean the extractor fan blades. You can use a vacuum cleaner here, as well.
  7. Wipe the fan with soapy water.Dip a cloth in soapy water and give the fan a good wipe. Use an old toothbrush to scrub off more stubborn grime. Try to clean both sides of the fan blades.
  8. Vacuum the fan housing.Vacuum any dust away from the housing and the vent. If possible, vacuum the vent cover on the outside of your house, as well.
  9. Rinse the cover.Take the fan cover out of the bucket and scrub the dirt off with a cloth. Rinse with warm water.
  10. Dry the parts.Using a clean towel, dry the fan and the cover. If needed, let the components air dry.
  11. Assemble the fan.Once everything is completely dry, put the fan and the cover back together. Make sure everything is in place.
  12. Test the fan.Turn the power back on and test the fan to see if it works. It should be a lot quieter now that all the dust and grime has been cleaned up.

Need help cleaning your bathroom?

Why not let the professionals help? Shining Oven offers a bathroom cleaning service service that can take care of all areas of your home, including the bathroom.

The experienced cleaners will help rid your home of grime and leave it looking and smelling fresh. They come equipped with all the tools and materials they need. The cleaning is done using professional equipment and products that are safe for you and your family.

Save time to do the things you enjoy. Simply book now using our online form and choose a time that suits your schedule!

How to clean a toilet

How to Clean a Toilet

Cleaning the toilet is probably the least desired chore right after cleaning the oven. Still, a dirty toilet looks bad, smells bad and is a breeding ground for numerous germs. The sooner you tackle this issue, the better.

So, if you

  • just moved into a new property and toilet looks like it has never been cleaned
  • plan to use bleach, but wonder whether there’s a more eco-friendly option
  • Have no idea what cleaning products to use
  • wonder how often you should clean the toilet

Then read along…

Preparation

The market is full of products for toilet bowl cleaning, but you can also make your own eco-friendly one in case you have small kids or pets. It’s really easy- just sprinkle some baking soda in your toilet bowl and pour 1 to 2 cups of white vinegar. Fizzing will occur, but don’t worry. Leave the solution to do its job, until you clean the rest of the toilet.

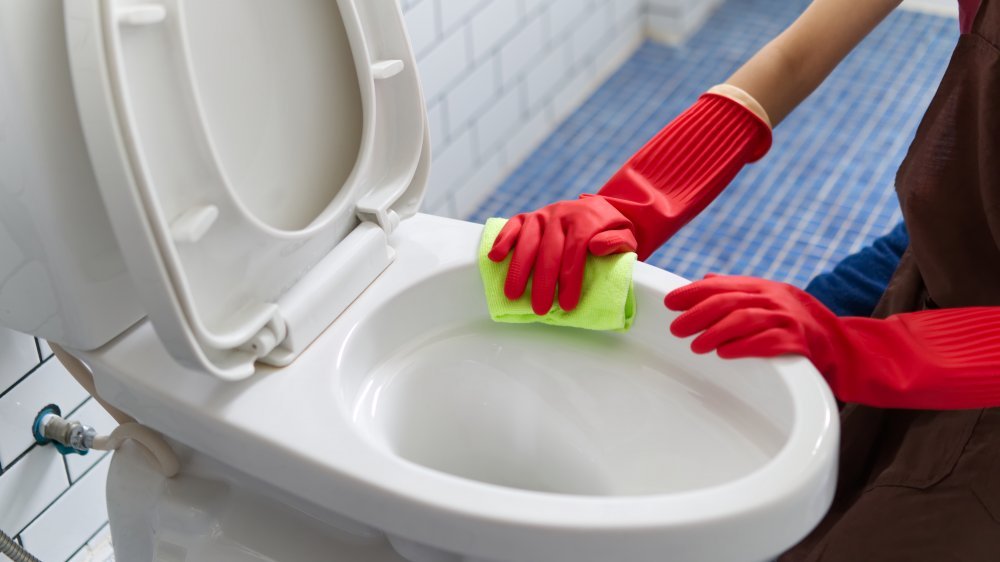
Always use a separate set of rubber gloves and sponges just for toilet cleaning. Never use them on any other surface in your home. To make sure you don’t mix them up with the kitchen pair, buy them in a different colour.

How to clean toilet exterior

  • Start from top to bottom.
  • Spray the tank, and handle with an all-purpose disinfectant (either a commercial product or one made out of equal parts of vinegar and water in a spray bottle).
  • Wait several minutes for the solution to do its job and then wipe it away.
  • Spray the lid top afterwards.
  • Spray the top edges on the outside of the bowl, then continue downward to the bottom edges where the bowl meets the floor.
  • If the floor around the toilet is also in need of cleaning, now is the perfect time to take care of it.

How to clean a toilet tank

If you want to clean the inside of your toilet tank before moving to the seat and bowl, this is what you should do.

  • Remove the tank lid and see if you have mineral buildup.
  • If yes, pour 4 cups of white vinegar inside and allow it to soak for about an hour.
  • Drain the tank by shutting off the water supply and flushing the contents of the tank.
  • Now that it’s empty and not refilling, scrub the inside with a brush.
  • Switch the water back on and allow the tank to refill, when all the gunk has been removed from the tank walls.
  • Flush it several times to rinse out the crud.

How to clean a toilet seat

After the tank and bowl exterior, make sure not to skip the seat. It may not look that dirty, but it is definitely germ-ridden.

  • Spray the lid on the inside as well as both sides of the seat.
  • Don’t miss the hinges and any hard to reach areas.
  • Spray the rim of the bowl as well.
  • Wait several minutes and wipe away the all-purpose disinfectant.
  • Use an old toothbrush to better clean around the hinges, if necessary.

How to clean rim jets

If you feel your toilet doesn’t flush as strongly as it used to, the problem might be clogged rim jets. Because these tiny holes are located under the rim, out of sight and hard to reach, we always ignore them until they stop working. This is how to clean them of mineral build-up.

  • Heat a cup of white vinegar. Not boiling hot, rather coffee hot.
  • Pour the vinegar into the overflow tube of the toilet tank and wait about 30 minutes
  • Flush the vinegar
  • Chip away the mineral build-up from the rim jets with either an old metal hanger or a hex key.
  • Flush every now and again to clear away the debris

How to clean a toilet bowl

  • Start by scrubbing under the rim. That’s got to be the dirtiest place of the entire bowl since it’s hard to see and reach.
  • After scrubbing it as clean as possible, move your efforts to the bowl and the drain hole opening at the bottom. When you’re done, flush the toilet.

In case your bowl has rust coloured rings from mineral build-up, you can scrub the porcelain with baking soda or a specially designed commercial product. Another eco-friendly option is to scrub the deposit with a pumice stone. Don’t worry – it won’t scratch the porcelain, just dampen it before scrubbing.

Hire a professional

If you cringe at the thought of having to clean your toilet instead of going out with friends, why not hire Shining Oven? The technicians we work with are highly experienced and always bring their own cleaning products and tools. Your toilet will look good as new, and while we’re at it, we might even clean your whole bathroom, should you want it.