How to clean a shower head

How to Clean a Shower Head

We all enjoy a relaxing shower in the evening or an energising one in the morning. However, there might be something lurking in the background.

When was the last time you cleaned your shower head? It’s probably been a while, right? If your shower head has been neglected for a long time, mineral deposits and limescale may have built up inside it, causing weak flow or water spraying in every direction but down. Not to mention the bacteria that may be thriving there, too.

So, if you:

  • Haven’t cleaned your shower head in a while;
  • Want to know how to clean removable shower heads;
  • Are looking for a way to clean your fixed shower head,

Then look no further! This post has the answers.

How to clean a handheld shower head

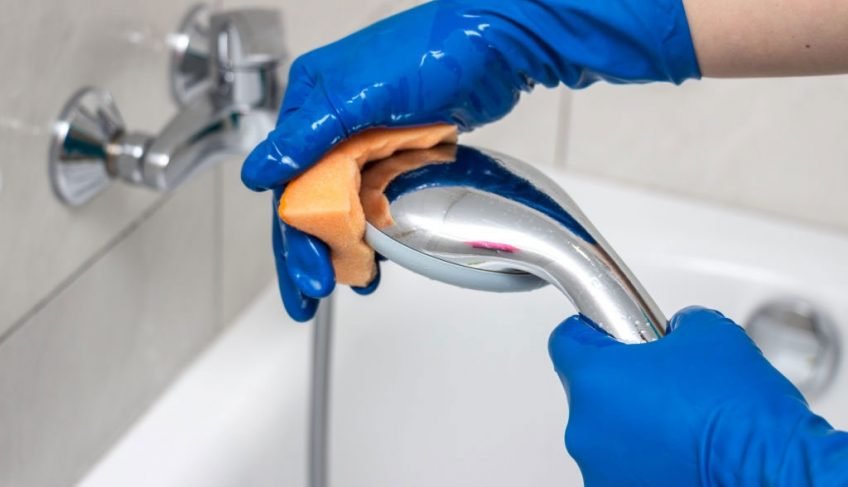
If your shower head is removable, you can deep clean it by taking it off its pipe or hose. So, here is how to remove limescale from a shower head:

What you need: distilled white vinegar, a plastic container, an old toothbrush, a soft cloth

Time needed: 1 hour.

  1. Remove the shower head.Take the shower head off the pipe or hose. If you find a rubber washer, keep it somewhere safe, as you will need to put it back afterwards to prevent leaks.
  2. Fill the container with white vinegar.Take your plastic container and fill it with white vinegar, enough to cover the whole item.
  3. Place the shower head inside.Put the shower head inside the plastic container, fully submerging it in the vinegar.
  4. Let it sit.Let the shower head soak for 30 minutes, or overnight, depending on how heavily soiled it is.
  5. Rinse.Take the shower head out of the vinegar and rinse it with tap water.
  6. Run water through it.Run tap water through the inside of the shower head to loosen and remove any stuck-on mineral deposits.
  7. Scrub nozzles.Scrub the nozzles with an old toothbrush to remove any stuck-on limescale.
  8. Polish.Polish the shower head with a soft, dry cloth.
  9. Reattach.Place the shower head back on the hose or pipe, putting back the rubber washer, as well.
  10. Run water through.Run clean water through for at least 30 seconds to completely rinse the inside of vinegar and limescale.

If your shower head is brass, gold or nickel-plated, do not leave it soaking in the vinegar for more than 30 minutes – it could damage the finish.

How to clean a fixed shower head

If your shower head is mounted and difficult to remove, you can still clean it using the same method. The only difference is you’ll need to attach a bag full of vinegar to it, instead of submerging it in a container.

What you need: Distilled white vinegar, a plastic bag, string or a rubber band, a soft cloth, an old toothbrush

  1. Fill a plastic bag with vinegar.
    Take the plastic bag and fill it halfway with white vinegar. Be careful not to overfill it, as it may spill out when you submerge the shower head.
  2. Place around the shower head.
    Attach the bag to the shower head, submerging it in the vinegar and securing the bag with a rubber band, string, duct tape or anything else you can use. Let go of the bag slowly and make sure it won’t fall off in the process.
  3. Let it sit.
    Leave the bag on for 30 minutes, or overnight.
  4. Take it off.
    Take the bag off the shower head and tip it into the drain.
  5. Run water through.
    Run clean water through the shower head for at least 30 seconds.
  6. Wipe.
    Wipe the shower head clean with a damp rag.
  7. Scrub nozzles.
    Scrub the nozzles with an old toothbrush.
  8. Polish.
    Polish the shower head with a soft, dry cloth.

How often should you clean your shower head?

Experts recommend that you clean your shower head at least once a month. However, if you live in an area with hard water, you may need to do this weekly, as limescale will build up quicker.

No time to clean your bathroom?

If cleaning your shower head or bathroom is not how you want to spend an afternoon, you can always rely on the professionals. Shining Oven offers you a bathroom cleaning service, performed by insured and experienced cleaners. You can sit back and relax while they tackle any cleaning chores for you.

Our cleaning service is sure to leave your home sparkling! Booking is easy – just use our simple online form and choose a time that suits your schedule.
How to clean your dishwasher

How to Clean Your Dishwasher

Step 1: Clean the Door

Keep the dishwasher door fingerprint-free by wiping the outside with warm, sudsy water. Or use a homemade dishwasher cleaner. Mix 1/4 cup baking soda with 1 quart of water. Avoid harsh cleansers or too-tough scouring pads that might scratch the dishwasher’s finish. When the door is clean, wipe it dry with a soft cloth. Wipe away tricky fingerprints and smudges with a little rubbing alcohol on a soft, dry cloth.

Open the dishwasher door so you can get at its top and sides. Dip a small toothbrush in hot, soapy water, and scrub around the door. Make sure you dig into the grooves of the rubber seal and any other crevices, including the hinges. This step might require gentle scrubbing with abrasive cleanser if there is a lot of buildup. Wipe up the resulting grime with a household sponge dipped in hot soapy water. Wipe away any cleaning solution left behind with a clean, wet sponge.

Clean the Tub

Before you start cleaning the tub, use a handful of paper towels to grab any debris from the base of the dishwasher. You’ll find most of the debris around the drain.

Once the debris is removed, you’ll want to run a cycle to clean the dishwasher. (It should be run empty.) You can use one of several DIY dishwasher cleaners. Here’s how to clean a dishwasher with vinegar: simply set a dishwasher-safe cup of plain white vinegar on the top rack. Then run a full cycle, choosing the hottest water possible to disinfect the unit while it’s being cleaned. When the cycle is done, wipe out the inside of the dishwasher with paper towels or a clean, dry cloth.

In place of vinegar, you can put a packet of unsweetened lemonade mix in the soap cup. Learn how to clean your dishwasher with baking soda, too, by sprinkling a cup of it on the bottom of the tub. For either method, run a complete cycle using the hottest water possible. Each will help clean and freshen your dishwasher.

Clean the Accessories and Parts

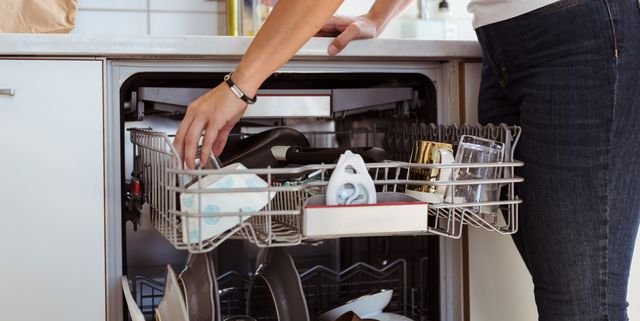
Next, clean the dishwasher accessories and parts. Take out the racks and utensil holders. Wipe off any stuck-on food particles or other debris. Scrub the spray arm with a soft brush or toothbrush to remove clogs.

Clean the Dishwasher Filter

To access the dishwasher filter, pull the bottom rack all the way out. The filter is usually located in one of the bottom, back corners of the appliance. If your filter is removable, twist to remove it from the dishwasher and rinse under hot running water to remove food particles and other debris. Wipe out the area beneath the filter inside the dishwasher with a damp cloth, sponge, or toothbrush. Once clean, add the clean dishwasher filter back into place.

Note that filters vary greatly across appliances. Refer to your owner’s manual for specific instructions on how to clean your dishwasher filter. (Don’t have the manual? Many manufacturers have them available on their websites.)

Tackle Rust Stains

Depending upon your water source and the state of your pipes, you might see mineral or rust stains inside your dishwasher. Check the laundry detergent section of your home center for products that remove rust stains from clothing or appliances. Place the product into the soap dispenser cup in your dishwasher and sprinkle some freely on the bottom. Run the empty dishwasher through a complete cleaning cycle.

Since the source of rust stains is systemic (e.g. your water comes from a private well or your home’s pipes are rusty), you will likely need to repeat this process on a regular basis unless you take care of the problems at their source. You might also want to ask a plumbing contractor to install a filter that can help with rust control.

Step 6: Eliminate Hard Water and Mineral Buildup

Depending on the type of water you have, your dishwasher may be susceptible to hard water deposits or mineral buildup. Cleaning with lemon can work wonders. Place a cup of lemon juice in the top rack or basket of your dishwasher and run a normal cycle. The acidic lemon juice will work to remove hard water spots and iron buildup.

The best way to clean a dishwasher is by doing a thorough cleaning once a month and tackling smudges and splatters on the exterior as they happen.

Book a professional service

Even though cleaning stainless steel splashback can be easy with the right tools and skills, some stains can be tough to remove and time-consuming. In moments like this, you should consider booking a professional service, especially if you don’t have a lot of free time to clean yourself. Shining Oven offers a range of oven/splashback cleaning services.

You can rely on expert cleaners that know how to get rid of even the most challenging stains and are always ready to take the weight of cleaning from your shoulders. Contact us now and book a local professional cleaner that will bring your splashback back to life. Moreover, If your kitchen appliances need a deep clean, consider combining both services for wonderful results!

How to clean stainless steel splashback

How to Clean Stainless Steel Splashback

Stainless steel splashbacks are a popular choice both among homeowners and professional kitchen owners. This is easily understandable as stainless steel is exceptionally resistant to rust and corrosion due to its tough protective film. Moreover, stainless steel has a non-porous surface, which means that no bacteria can make their way through existing cracks. However, stainless steel splashbacks can also be easily damaged if not taken care of properly.

So, if you:

  • Are wondering how to clean your greasy stainless steel splashback; 
  • Don’t know what cleaning products to use;
  • Want to know how to maintain and keep your splashback clean;

Then, read on!

What products you will need

Before rolling up your sleeves, you need to make sure you have all the necessary tools and products. Frankly, that is not difficult as most of the products can be found in every common kitchen.

  • White vinegar;
  • Empty spray bottle;
  • Lint-free cloth/paper towels;
  • Olive oil;
  • Baking soda;
  • Liquid dish soap;
  • Stainless steel cleaner.


Warning!
 Never use silver dip polishes to clean stainless steel because they can cause corrosion, nor use abrasive cloths because they can scratch the surface.

How to clean stainless steel splashback?

There are several techniques to clean a stainless steel splashback using easy to find home remedies. Once you make sure you have the right products, it’s time to get to work. Here we suggest three main methods that can get your stainless steel splashback as clean as the day you first installed it.

Method 1. Cleaning with vinegar

White vinegar and apple cider vinegar do miracles when it comes to stubborn stains. They can break down bacteria and grease and make a surface sparking clean again. To clean your splashback:

  • Pour equal amounts of vinegar and water into an empty spray bottle, then spray the solution on the splashback. Don’t restrain yourself from spraying extensively.
  • Let the solution sit for a few minutes, after which wipe clean in the direction of the grain using the cloth or paper towels.

Method 2. Using baking soda

Every housekeeper knows that baking soda is good not only for cooking. Similarly to vinegar, baking soda can break down stuck-on grease. Even the most challenging stains don’t stand a chance.

  • Make a cleaning paste by mixing baking soda with water, or even better with liquid dish soap.
  • Apply the paste to a clean, lint-free cloth and rub gently in the direction of the grain.
  • Lastly, rinse with a damp cloth or towel and wipe it dry to avoid water markings.

Method 3. Stainless steel cleaner

If your cooker splashback is in a visibly bad shape and neither of the above-mentioned methods works, you can also turn to specialised stainless steel cleaning products for help. As those kinds of cleaners are powerful, you shouldn’t leave them on the splashback for long. This can cause discolouration in the steel. After you apply them on the splashback, following the instructions on the product’s back, rinse thoroughly and wipe dry.

How to maintain and keep stainless steel splashback clean

We all know that if a surface is properly maintained and regularly cleaned, the later on thorough cleaning will be easier, faster and won’t be necessary as often. That is why we recommend regular maintenance with silicone oil.

To keep your stainless steel splashback shiny and free of filth for longer, apply a cleaner that contains silicone oil after every time your splashback becomes a target of grease splashes.

Stainless steel splashbacks have a clearly visible grain direction. So another important thing to always keep in mind is to follow that direction when wiping the surface clean. Otherwise, you risk scratching the steel and damaging its properties.

Book a professional service

Even though cleaning stainless steel splashback can be easy with the right tools and skills, some stains can be tough to remove and time-consuming. In moments like this, you should consider booking a professional service, especially if you don’t have a lot of free time to clean yourself. Shining Oven offers a range of oven/splashback cleaning services.

You can rely on expert cleaners that know how to get rid of even the most challenging stains and are always ready to take the weight of cleaning from your shoulders. Contact us now and book a local professional cleaner that will bring your splashback back to life. Moreover, If your kitchen appliances need a deep clean, consider combining both services for wonderful results!

Grease fires what to do if your oven catches fire

Grease Fires – What to Do if Your Oven Catches Fire

There are various reasons why an oven can catch a fire. It’s often more than just forgetting the dinner in it for a longer period of time.

  • Leaving the oven on while there’s still something inside it and forgetting about it.
  • Food scraps, grease spots and forgotten pieces of parchment paper.
  • Cooking with too much grease can lead to splatters which ignite a fire when they touch the hot surface of the oven or the heating elements.
  • Overflowing batter when baking cakes and other pastries can cause a small fire on the bottom of the oven.
  • Baking on parchment paper but leaving too much outside the baking tray or pan. The edges of the paper can catch fire if they are too close to the heating elements of the oven.
  • Grease build ups on the bottom, sides and the door of the oven can catch fire when heated.

Can leaving the oven on cause a fire?

As mentioned above, there are several reasons why an oven can catch fire. However, what about cases when you simply forgot to turn it off after taking the cooked food out? Can leaving the oven on cause a fire? It depends on several factors.

If there are grease splatters or if parts of the food have leaked all over the oven bottom, then even if it’s practically empty, an oven that’s still running on high temperature can cause a small fire. If your oven is clean there shouldn’t be any worry as fires need an ignition source (an electrical heating element or gas burner), fuel (oil splatters, grease buildups, food scraps) and oxygen. If you take one out, then there shouldn’t be any fire in sight.

Can a self-cleaning oven catch fire?

Self-cleaning ovens rely on high temperature (500°C to be precise) to burn off any leftovers and grease spots left from cooking. Thanks to their pyrolytic ground coat, such ovens can reduce any food bits to ash, making it easier for you to clean the inside of the oven. For extra safety, the oven walls are coated with special porcelain which is resistant to heat and acid. Another safety feature is a mechanical interlock which keeps the oven door tightly shut and locked during and after the self-cleaning cycle. This is to make sure that you, your kids or pets, won’t get burned by accidentally opening the door midway.

So can a self-cleaning oven actually catch fire? There are actually reports by owners who say that their self-cleaning oven caught fire midway the cleaning cycle. So it’s actually possible, but it’s not that common. The most common cause for flames in these ovens are food scraps and too much grease buildups. If you leave larger bits of food inside or know that there’s a tiny puddle of grease but still decide to turn on the self-cleaning feature, then you’re bound to end up with a grease fire inside the oven. Always make sure to remove any bigger food bits and grease buildups before using the self-cleaning cycle. There are also special cleaning products for self-cleaning ovens that are used before turning on the program.

Another possible cause for a fire in a self-cleaning oven can be poor insulation or cracks in the porcelain coating. If you notice any of these, don’t use the self-cleaning feature before you fix them.

How to Put Out a Grease Fire in the Oven

Oven grease fires may not happen every day, but it’s important to know what to do when one does actually occur.

  1. Stay calm and don’t panic.
  2. Resist the urge to open the oven and see what’s going on! If you open the oven door, the flames will grow stronger as they have more access to oxygen. Not to mention that you can get severely burned all over your face and hands.
  3. Keep the oven shut and let the fire die out.
  4. Use a fire extinguisher to put out the flames. Remember that you should keep an extinguisher in your kitchen at all times. It’s best if you have one that’s for oil and gas fires.
  5. Call the fire brigade as soon as possible. Even if you use a fire extinguisher, grease fires can be stubborn and it’s better to have professionals deal with them.
  6. DO NOT use water to put out a grease fire! Water will only cause the oil to splatter and cause the flames to expand.
  7. Some people say that pouring salt or baking soda over grease fires can put them out, but this works only on small-scale ones. You’d need a bucket or two of baking soda to smother a grease fire if it’s out of control. Apply this method only on really small, smoking grease splatters.

How to Clean an Oven After a Grease Fire

You might think that once your cooker has been in flames, you can’t use it again and should buy a new one. Chances are you actually can use an oven after a grease fire. You just have to make sure you’ve cleaned it thoroughly and it’s functioning properly. But how do you clean an oven after a fire?

How to clean an oven after fire extinguisher use

There are several specific steps that you must take when cleaning an oven after fire extinguisher use.

  1. Wear a face mask and put on a pair of rubber gloves. These will keep you from inhaling or touching extinguisher residue.
  2. Get a dustpan brush and try to loosen up any caked up bits.
  3. Use a vacuum to clean as much of the dry extinguisher residue and the bits you’ve loosened using the brush.
  4. The next step is to clean the rest of the material with a damp sponge. It will get quite messy, so make sure you rinse the sponge frequently. Thoroughly wipe the entire inside surface of the oven. Do it more than once, just to make sure you’ve removed any caked on bits.
  5. Follow with a general oven cleaning as you’d normally clean it if there hasn’t been a fire.

How to clean an oven if you’ve used other methods to put out a fire

If the grease fire in your oven was rather small, chances are it died out on its own once the oxygen in the oven ran out. Maybe you’ve poured salt or baking soda over it just in case, to make sure it’s completely out. The cleaning process is basically the same as after fire extinguisher use. You have to vacuum any salt or baking soda, loosen any caked bits and remove any bits of burnt food. Once this is done, proceed with a regular oven cleaning.

Need help cleaning your oven?

Let Shining Oven take care of the cleaning for you!

Cleaning after a grease fire can be hard work, as not only will you be removing grease, you’ll have to get rid of any soot and leftover residue, all of which can take hours to remove. Here at Shining Oven, we’ll supply you with a professional to make sure your oven is spotless in no time. The professionals use the best detergents and the best methods to provide you with amazing results, all of which is included in the oven cleaning cost. Plus you can use your oven immediately after the cleaning is done.

How to clean a fan assisted oven

How to Clean a Fan Assisted Oven

What is a fan oven?

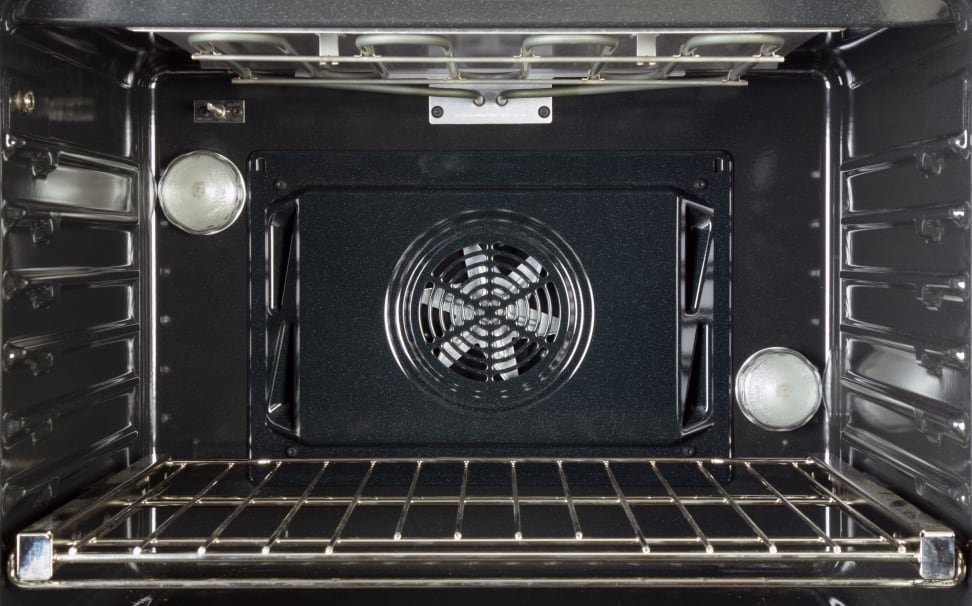
A fan oven (also known as fan-assisted or a convection oven) is an oven which has a fan and an exhaust system. The fan is placed at the back of the interior. It blows hot air around the oven so food can be cooked more evenly and more quickly. Regular ovens lack this system and just surround the food with hot air, instead of circulating it.

Now when that’s out of the way, let’s get down and dirty, literally…

How to clean a fan assisted oven?

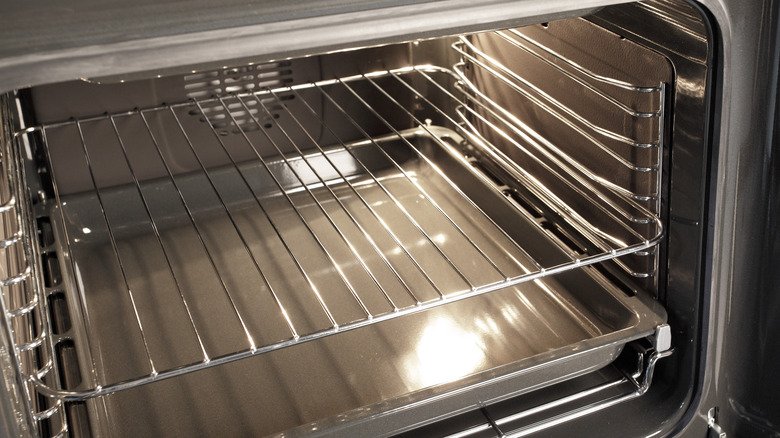
You can use 3 methods. Before doing so, however, make sure to get any trays and racks out. They can be cleaned separately. Once that’s done, let’s start with:

Self-cleaning feature option

Most modern ovens have this cool-sounding feature: self-cleaning. Sounds like you can just turn it on and go read a book, while the oven takes care of itself. Unfortunately, it’s not like that. The self-cleaning function heats the oven to extreme temperatures of about 900°F (482.°C). The heat reduces all the leftover grease and food bits to ash, making it easy to wipe away. That doesn’t mean no effort is involved.

  1. Remove the racks and trays as the extreme heat will likely damage the chrome plating. These need to be cleaned separately. Fortunately, you’d have time to do that since the self-cleaning feature takes several hours to finish. Learn how to clean oven racks naturally here.
  2. Switch the self-cleaning option on and set the amount of hours. Make sure the oven door is closed properly so no fumes or heat would escape.
  3. Vacate the room of any children and pets, and open all the windows and doors once the cleaning procedure starts. Depending on your oven model, the self-cleaning cycle may take around 4 hours. Check the user manual for details.
  4. Once the cleaning procedure finishes, the oven will need several hours to cool down.
  5. Clean the ashes from the oven interior by giving it a good wipe down.

Eco-friendly option – Using baking soda and water

  1. Sumaišykite kepimo soda ir vandenį, kad susidarytų pasta. Kadangi valysite visą orkaitės vidų, jums reikės bent puodelio kepimo sodos. Įdėkite jį į plastikinį indą ir užpilkite šiek tiek vandens. Nepamirškite išmaišyti. Įpilkite tiek vandens, kad formuojanti pasta sutirštėtų, nepersistenkite.
  2. Mentele arba minkšta kempine uždenkite orkaitės vidų pasta. Pabandykite plonu sluoksniu paskleisti visą paviršių. Įpilkite papildomo mišinio tose vietose, kur matote sunkių dėmių. Orkaitės  inžinierius  visada patars neuždengti kaitinimo elementų ir vidinių ventiliatorių pasta, kad vėliau išvengtumėte remonto darbų.
  3. Uždarykite orkaitės dureles ir palikite valymo mišinį kelias valandas, kad suskaidytų riebalus ir maisto daleles. Dar geriau, palikite per naktį.
  4. Nuvalykite pastą virtuvine kempinėle arba drėgnu skudurėliu. Visas maisto daleles turėtų būti lengva pašalinti, bet jei susidursite su užsispyrusiomis, apipurkškite jas baltuoju actu. Cheminė reakcija padės atsikratyti kietų nešvarumų.
  5. Pašalinus visus riebalus ir nešvarumus, nuvalykite orkaitę švaria šluoste, pamirkyta švariame vandenyje. Taip užtikrinama, kad neliktų maisto dalelių ar valymo pastos likučių. Baigę išskalauti orkaitę, galite leisti jai išdžiūti pačiai arba išdžiovinti patys, naudodami sausą švarų skudurą. Arba galite keletą minučių įjungti prietaisą žemiausiu nustatymu, kol jis išdžius.

So far, the methods can be used for regular ovens as well as convection ovens. Here is where it gets tricky.

How to clean convection oven fan

  1. Unplug your fan oven from the mains.
  2. Get a screwdriver and unscrew the bolts holding the protective cover.
  3. Get a socket wrench and unscrew the fan blade nut. Keep in mind, it’s reverse threaded.
  4. Place the fan blade in a dip tank full of cleaning solution. The particles will degrade and become easier to scrape off after 40 to 50 minutes. (You can clean the blade while it is still attached to the interior of the oven. Keep in mind, that will be very hard and you will only be able to clean its front side.)
  5. Reinstall the fan blade, once it’s clean and dry. Notice the motor shaft thread is in the shape of a D and so is the blade hole.
  6. Screw the cover back on, by lining up the holes.
  7. Test run

Think that’s too much hard work and you don’t remember where you left your toolbox? Well, why don’t you just…

Hire a professional oven cleaner

These methods sound easy to pull off on paper, but if you lack enough time and especially the willpower, they can be quite overwhelming. Fortunately, you can save yourself the time and trouble by giving Shining Oven a call and booking a professional oven cleaning technician. The pro will disassemble your convection oven and clean each part separately in a matter of 2 to four hours. Afterwards, he will put everything back together and test run your convection oven. Your cooker will get back its former shine while you spend your time on more pleasurable activities. Book your oven cleaning today!

How to clean oven racks naturally

How to Clean Oven Racks Naturally

If you regularly use your oven, you probably know the struggle of cleaning it. Because our ovens consist of many parts that tend to become greasy over time, it is always helpful to know a solution that can ease up the oven cleaning routine. If you are a happy owner of a self-cleaning oven, the oven racks still require old-fashioned cleaning, as they might get damaged from the self-cleaning functionality.

There are many cleaning products that you can easily find in a local store. However, most of them are filled with dangerous chemicals that release harmful fumes. So, is there any way to clean oven racks naturally? Of course, there is!

So, if you are someone who:

  • Avoids using chemicals in their house because of allergies and health problems;
  • Wants to clean their oven racks using only natural products; 
  • Doesn’t have specific oven cleaning products at the moment.

Then this article is just for you! Here, you will read all about how to clean oven racks naturally by using products such as baking soda, white vinegar and more!

How to clean oven racks naturally with baking soda and vinegar

Use the following items: 

  • Baking soda – if you don’t have any, you can use borax; 
  • Distilled white vinegar; 
  • A scrub pad, or an old toothbrush if you don’t have a pad; 
  • An old towel. 

Here is how to clean oven racks using natural white vinegar and baking soda: 

  1. Place the old towel in a dry tub or a big basin, if you don’t have one. 
  2. Put the racks inside and generously pour the white vinegar on them. 
  3. Add the baking soda and wait for around 10-15 minutes. 
  4. The two ingredients should start foaming. When that is complete, fill the tub or basin with hot water so that it covers the racks completely, and let them soak overnight. 
  5. The day after, scrub the racks with the scrub pad or with a toothbrush to remove any grime that is still stuck. 
  6. If there is any stubborn dirt left, you can add kosher salt to the water. The mixture will turn it into an abrasive cleaner. 
  7. When you are satisfied with the results, just rinse with water and let the racks air dry.

How to clean oven racks in the bathtub with aluminium foil

That’s one of the best ways to clean oven racks, and it’s pretty straightforward.

  1. Wrap the oven racks in aluminium foil and place them in a bathtub filled with hot water.
  2. Then add two dishwasher tablets to the water and let them react with the foil for a few hours (the more, the better) and drain the tub.
  3. After removing the foil, the grease and burnt-on food should be very easy to wipe away.

Cleaning oven racks in the dishwasher

Cleaning your oven racks in the dishwasher is the most hassle-free way to remove any stubborn and greasy residues. Oven racks are dishwasher safe so if you have enough space in your appliance, then give it a try. However, before putting oven racks in the dishwasher, make sure to remove burnt-on food particles.

Why avoid Self-cleaning feature for cleaning oven racks?

You might think there is no point in cleaning oven racks by hand if your appliance has a self-cleaning feature. However, the high temperature of this cycle can be damaging to the internal components of the cooking appliance. It would also likely destroy the finish of any chrome or stainless steel racks. This is why we recommend you clean this important part of your oven by hand and with natural products. It will help keep your oven in good working order, and there will be no dangerous fumes escaping and polluting the air.

Hire a professional oven cleaner

Even though these methods can be quite easy, they can still take a lot of time, especially if you have to clean the whole oven and not just the racks. Save yourself the trouble and call Shining Oven today to book a professional oven cleaning technician. They use a highly effective dip tank method that includes disassembling the whole oven and cleaning the parts separately. After that, the expert will put your oven back together and you will get to enjoy your shiny clean cooker again. Better food and more time with the people that really matter! Book your oven technician today!